
Articles


Rustでsqlxを利用して、GCPのCloudSQLにPrivate IPで接続する場合はruntime-actix-rustlsではなくruntime-actix-native-tlsを利用する
GCPのCloudSQLにはパブリックIPではなくPrivate IPで接続する方法があり、その場合はhostにIPを使用するためruntime-actix-rustlsだとうまくいかなかったのでメモ。


Macが起動しなくなってもターゲットディスクモードでデータは救出できるかもしれない。iMac故障から修理までの覚書
初めてMacが故障し、ローカルデータが吹っ飛びそうになったのでその時の記録。

gatsby-theme-cruzooをgatsby v3対応にアップデートしました
Crudzooで使用しているGatsby themeをgatsbyバージョン3対応するためのアップデートをしました。同時にデザインもアップデートしました。

サイトデザインの更新をCSS Modulesで進行中。CSSのアーキテクトについて考えていることなど。
1年に1度くらいの頻度で行っているサイトデザインの更新、今年はcss-modulesを使うことにしました


1Passwordを使ってずさんなパスワード管理生活から脱却する
使用するサービスが増えるほどに負担となるパスワード管理。行き着く先はランダムっぽい自前の文字列から1文字2文字変えた脆弱なパスワード達。パスワード管理ツールを使えばパスワードを忘れる心配から解放され、脆弱なマイルールに縛られる必要もありません。

2021年に買った福袋、毎年恒例の中田ハンガーと初めてのTENERITA
オンライン販売がメインとなった2021年度の福袋。年々手堅くなっていく福袋選びの中、2021年は中田ハンガーとTENERITAを選びました。


AWS S3にアップロードした静的サイトを独自ドメインでCloudFrontから配信する
S3に設置した静的サイトをCloudFrontとRoute53を使用し独自ドメインで配信するまでの覚書

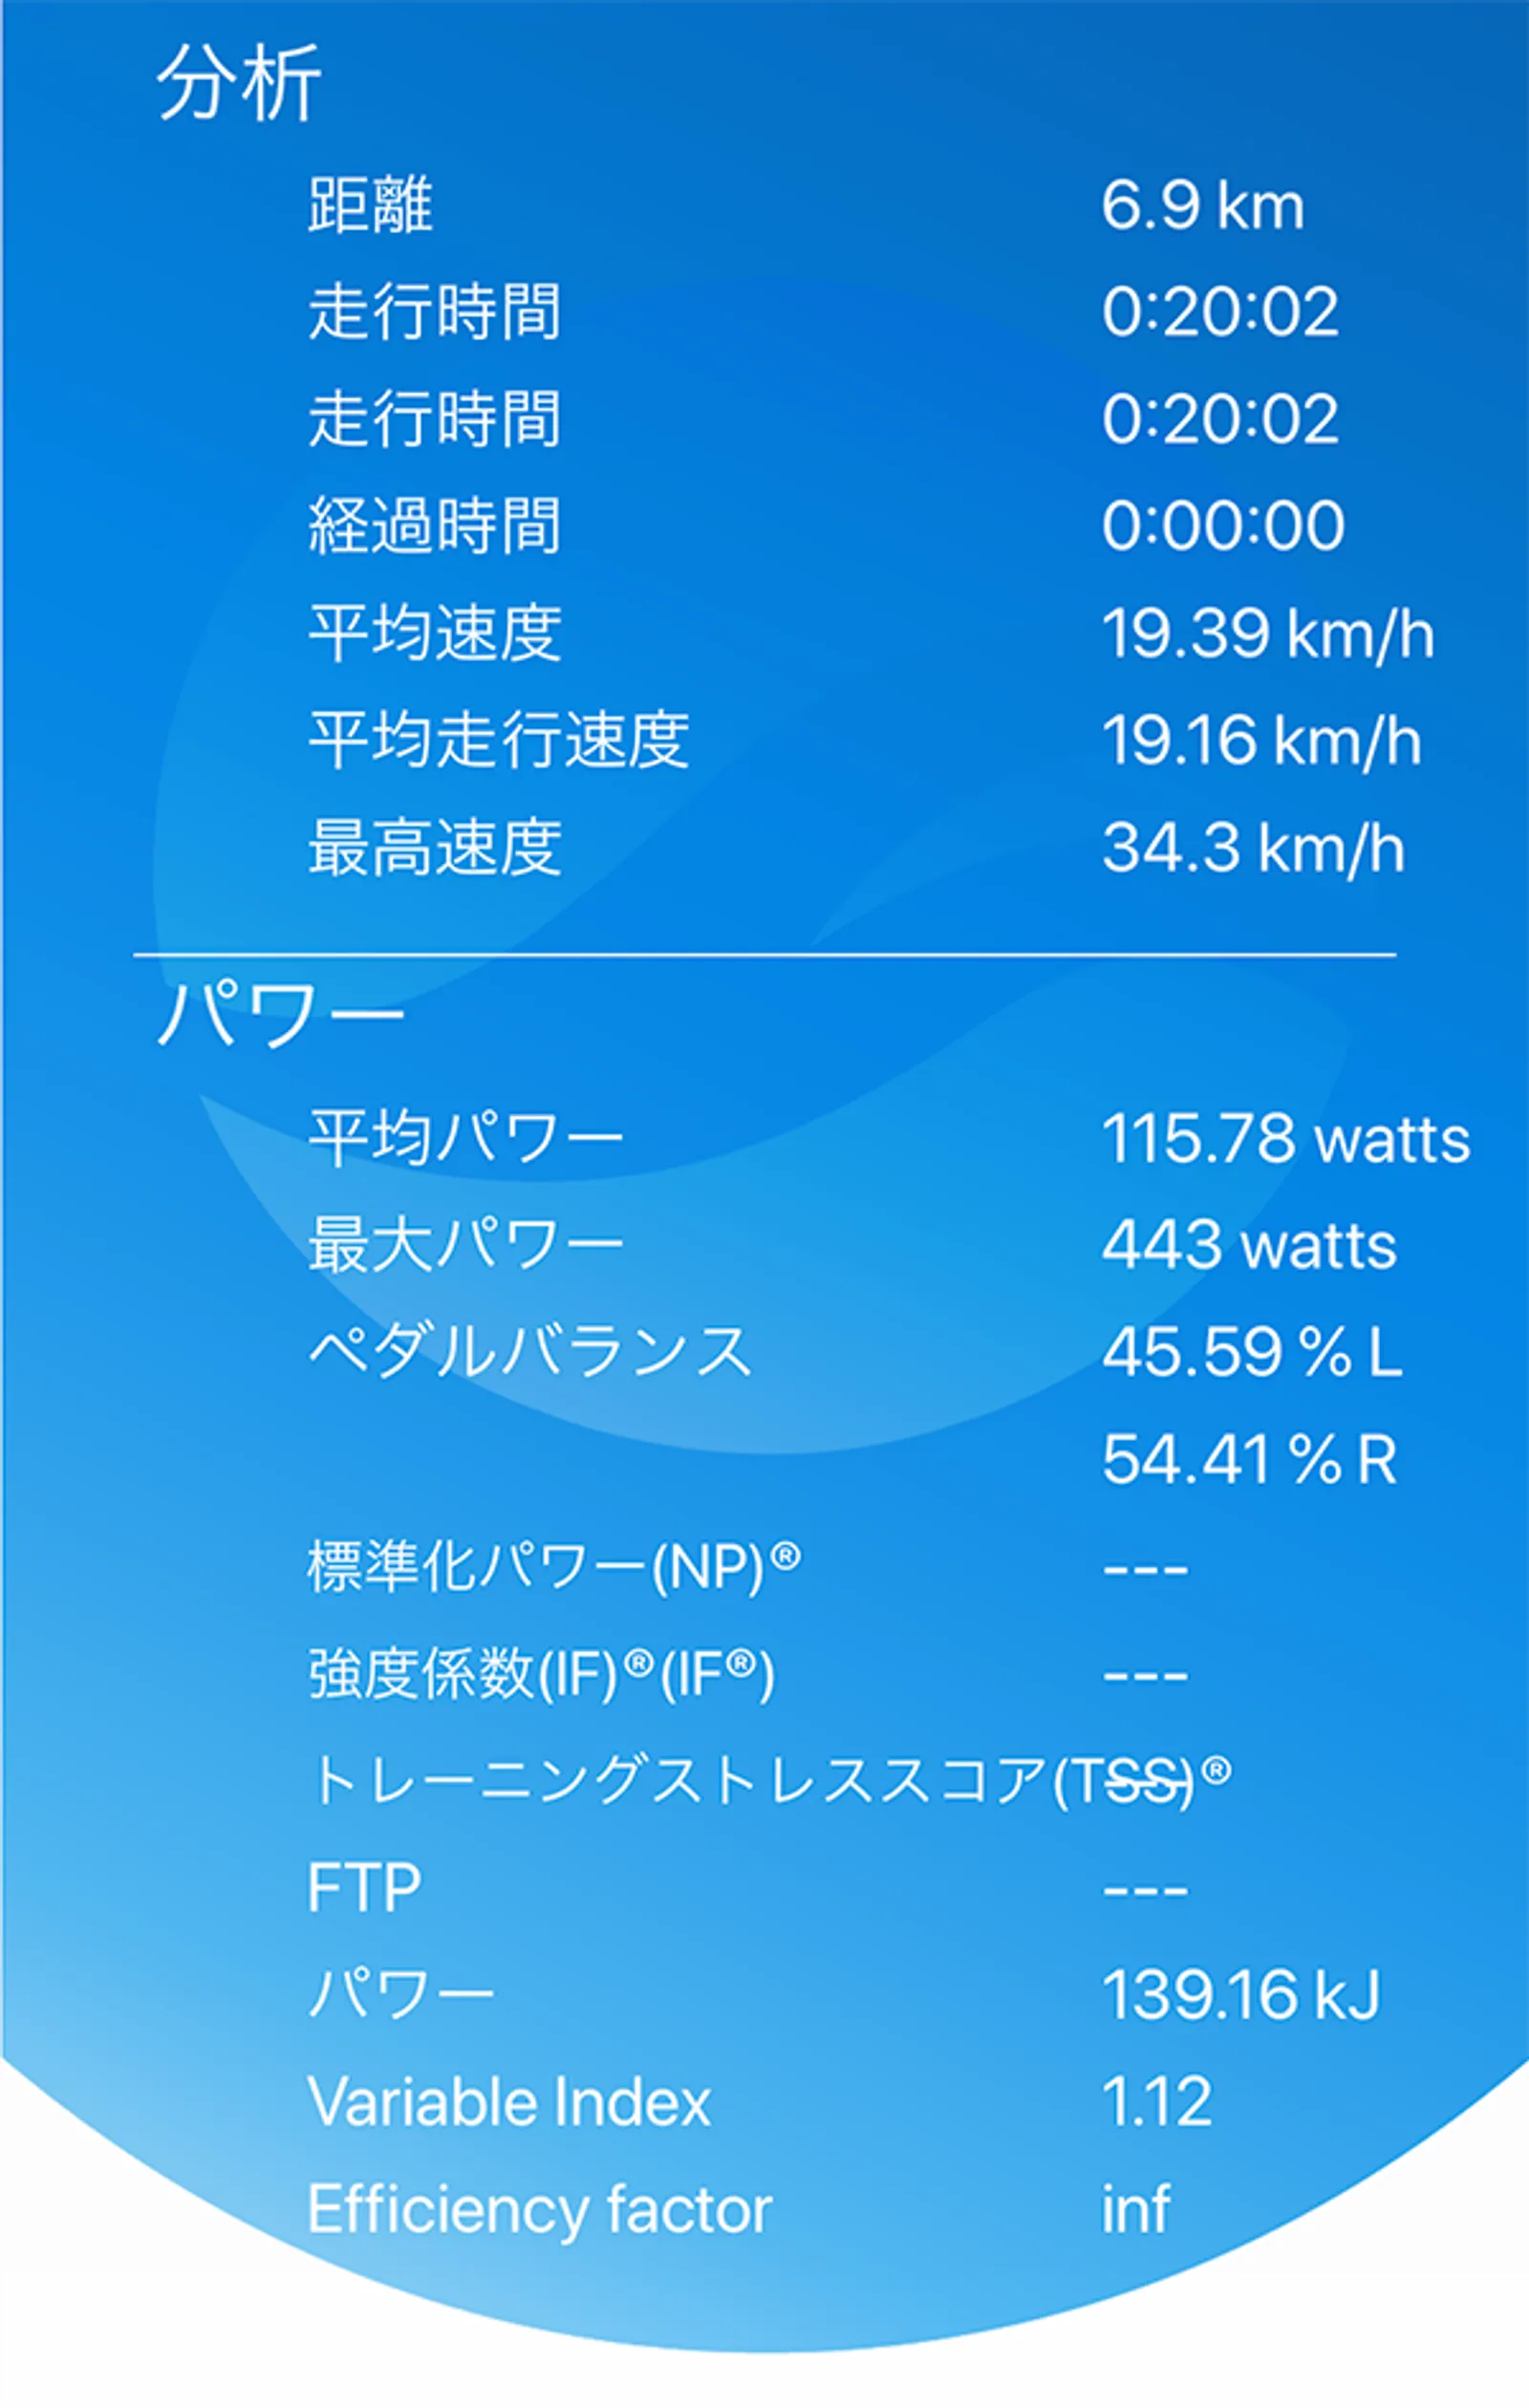
初心者脱却に向け、パワーをかけ続けて走行ログのパワーゾーンを押し上げる試み
ライド終わりにライド結果を見るといつも回復走でパワーゾーン1が大半。パワーを意識して走行ログのパワーゾーン分布を改善する試みをしています。

静的サイトをGithub ActionsでAWS S3にデプロイする
Netlifyで無料運用していたこのブログをAWSのS3 + CloudFrontでの配信に切り替えました。Githubに変更プッシュするとGithub actionsでbuildファイルがS3にデプロイされるまでを紹介します。


貧脚脱却のためのパワートレーニング事始め
初の100kmライドを終えて多くの課題が見つかりました。自身の体力のなさと貧脚という現実と戦うため、トレーニングをどのように行えば良いかを調べました。

初めての100kmライド、葛西臨海公園〜秋ヶ瀬公園の往復に挑戦
ロードバイクにも慣れサイクリングロードでの50kmライドを達成。これなら100kmもいけると考え、ソロ100kmライドに挑戦することにしました。

サイクルコンピューターのGarmin Edge530を購入。100kmライドのコース作り
ロードバイク用のサイクルコンピューターど定番、Garmin Edgeシリーズの530を買いました。Garmin connectを使用し、100kmライドのコースを作って準備します。

成長を楽しむためにFTP(Functional Threshold Power)の計測
ロードバイクの世界ではスピードやケイデンス、心拍の他にパワーという指標があり、これを元にトレーニングを行うのが効率的と聞きました。乗り始めで計測しておけばすぐ成長して楽しいかと思い、計測することにしました。

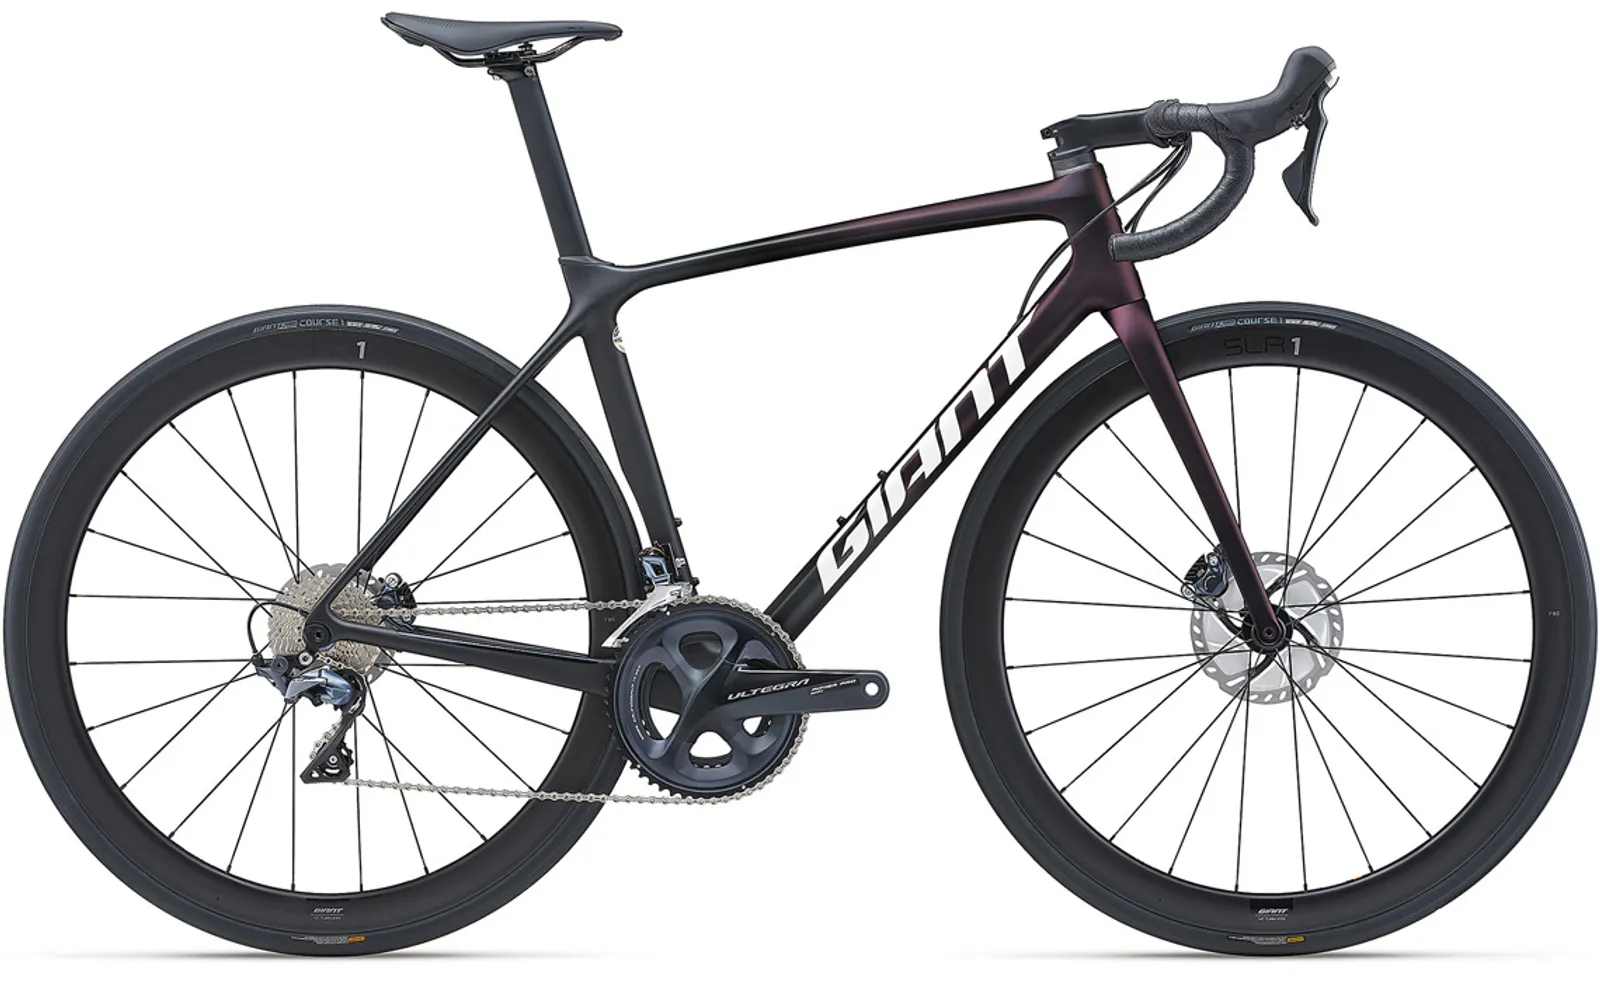
ロードバイク納品!店舗から自宅までの自走で当て逃げされカーボンホイール削られる
注文していたロードバイクが無事に納品されました。店舗で簡単な説明を受けた後はいよいよ自走です。ファーストライドは店舗から自宅まで25km程度。怖がりながらのライド中、信号無視のロードに当て逃げされました。

ロードバイクに必要なもの、服、シューズ、スタンド、サイクルコンピューターなどの選定と購入編
ロードバイクに必要なものはたくさんあります。家で保存するためのスタンド、ペダルに合わせたシューズ、専用の服、手袋、サイクルコンピューター、鍵。初心者は店員に聞きましょう。


Netlifyで運用しているGatsbyを使ったblogにalgolia検索を導入する
Gatsbyで作成したブログサイトにalgoliaを導入し検索を可能にするまでの手順。Netlifyを使う場合の環境変数の設定についてまとめました

React hooks対応のReact ReduxはどこでuseSelector、useDispatchするのか
React hooksに対応したv7.1.0以降のReact Redux。非常にすっきりと処理をかける反面、どこでuseSelector、useDispatchするかを試行錯誤しています

iMac 27インチ(2019)のレビュー
iMac2019年モデルを2019年10月に購入。使い込んでいくうちにわかる良いところ、悪いところをまとめて紹介します。気まぐれで更新します

Google Cloud Run + Google Cloud FireStore + Firebase AuthenticationとGoで作る認証付きデータ保存、取得API
Google Cloud Platformで提供されているCloud FireStoreをデータベースに使い、アプリケーションをGoogle Cloud Runで動かし、ユーザーの認証はFirebaseのAuthenticationを使用してAPIを作成する方法です。実装言語はGo、テスト用のウェブはReact。

JavaScriptの変数宣言、var、let、constの使い方とオブジェクト型のコピー、更新について
JavaScriptの変数宣言、var、let、constの使い方の説明。また、変数にオブジェクト型を代入した時、直感的でない振る舞いをするオブジェクトや配列について解説し、それらのデータ更新やコピー方法をまとめました。

Google Cloud Functions + Google Cloud FireStore + Firebase AuthenticationとGoで作る認証付きデータ保存、取得API
Google Cloud Platformで提供されているCloud FireStoreをデータベースに使い、データベースへのアクセスをGoogle Cloud Functionsで行い、ユーザーの認証はFirebaseのAuthenticationを使用してAPIを作成する方法です。実装言語はGo、テスト用のウェブはReact。

The Gatsby Theme Jam Contestに参加したのでその感想とtheme作成時のa11yや機能実装のことなど
GatsbyのTheme機能が正式に機能された記念にGatsby Theme Jam Contestが開催されました。参加した感想です

ESLintを使用してJavaScriptの開発効率を上げる
ESLintを使用すると、誤字、セミコロン、クオート、未使用の変数やブロックなど開発中に気づきにくいミスが見つけやすくなります。また、独自のルールを作成できるので同じコードを触る人でルールの統一がしやすく、不必要な差分を減らすことができます。この記事ではESlintの設定方法を紹介します。

ライブラリなしのJavaScriptで作る、関数ファクトリを使ったCounterのサンプル
ライブラリなしのJavaScriptで関数ファクトリを採用しCounterを作る方法を紹介します。Closureを使うことでfunction内にprivateな変数、関数を定義できるため開発、保守、テストが行いやすいはずです。


Gatsby Themesの安定版リリースされたのでgatsby-crudzooもアップデートしました
experimentalな機能だったGatsby Themesが正式にリリースされました。オリジナルのgatsby-crudzooも対応しています。

納得するための、なぜフロントエンド開発でwebpackなどを用いた複雑なJavaScript開発環境を作るのか
JavaScriptの開発環境を整えるのは難しく、プログラムではなく開発環境を揃える学習コストがかかりがち。なぜフロントエンド開発に様々なツールを使い、開発環境が必要なのかをまとめました。

Dockerで作るNginx + PHP7 + Xdebug環境
docker-composeでNginx + PHP7 + Xdebugの環境がすぐに立ち上げるように設定を作ります。また、VSCodeでXdebugを動くように設定もします。

初めてReactをプロダクションで採用した時に役立ったこと、情報収集についての思い出
Reactを導入する時に試行錯誤したこと、情報の集め方など、当時の思い出の覚書。